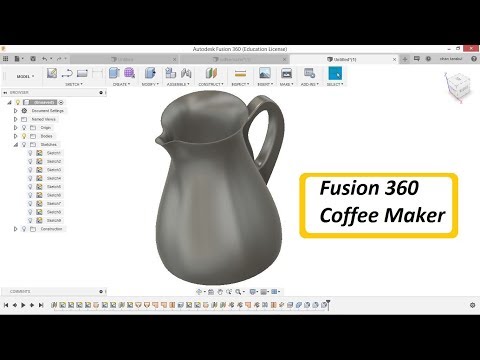
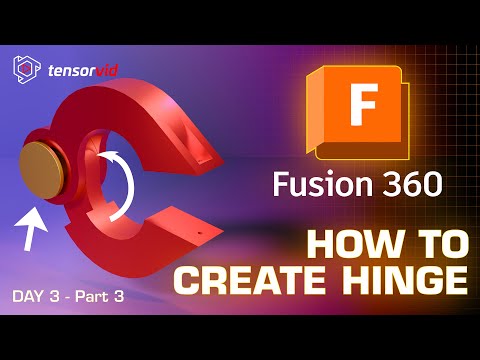
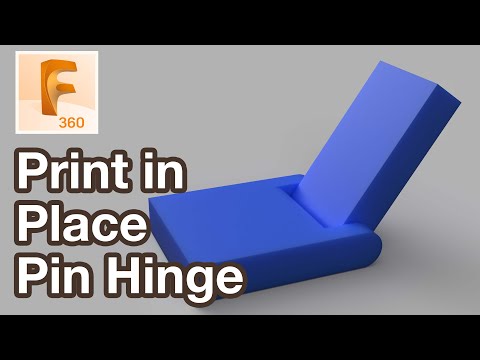
Welcome to Tensorvid — your hub for learning and inspiration. Learn real life skills in broad topic such as design, ai, modelling, and coding. Welcome back to the 'How to create any mechanical shape in Autodesk Fusion 360 Tutorial series for beginners! Part 1 - Part 3 - Playlist - In this Day 3 tutorial, we begin designing a fully functional, print-in-place roller clamp with a working hinge. This video focuses on the most critical phase: setting up the perfect initial sketch and defining the precise 3D printing clearances required for the hinge to move freely. You will learn how to use construction lines, apply powerful geometric constraints, and design with a print-in-place mindset to avoid common manufacturing errors. 0:03 - Intro: Starting the Clamp Extrusion in Fusion 360 1:08 - Creating the Bottom Clamp Component & Setting Correct Extrusion Distance 2:20 - Understanding and Defining Clearance for Moving Parts 3:18 - Applying Clearance Parameter and Extruding with Precision 4:20 - Building the Top Clamp Component & Matching Dimensions 5:17 - What’s Next: Designing the Hinge and Perfecting Print-in-Place Movement This is the next video of the Creating Mechanical Shapes Series—perfect for Fusion 360 beginners, engineering students, hobbyists, and anyone learning CAD design for manufacturing or 3D printing. Software: Autodesk Fusion 360 Key Topics Covered: Print-in-Place Design, Hinge Clearance, Sketch Constraints, Construction Geometry, Mechanical Part Design Don’t forget to check out the full playlist for more Fusion 360 tutorials! #Fusion360Tutorial #Fusion3603DPrinting #Fusion360MechanicalDesign #Fusion360Hinge #CADforBeginners
- 685Просмотров
- 1 месяц назадОпубликованоTensorvid
How to create a hinge Clamp in Fusion 360 Beginners Tutorial Part 2
Похожее видео


Популярное
Новини