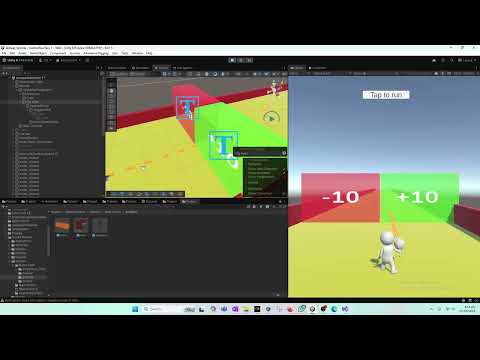
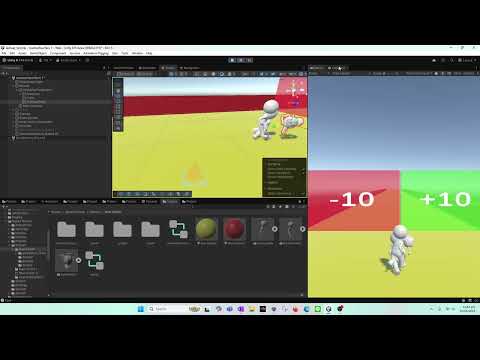
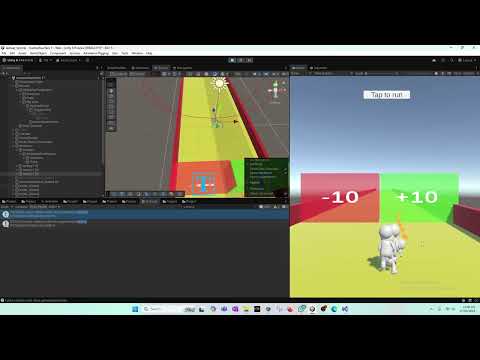
In this Unity game development tutorial, we fix a player movement trigger bug and then build a complete bullet shooting system from scratch. This video is part of our ongoing Unity series where we focus on writing clean, optimized, and scalable code for real games. We begin by addressing a critical issue in the player movement logic. The problem occurred when the player entered +10 or -10 trigger zones, where movement was restricted to only one direction. After reviewing the code closely, we discovered that a condition checking clientStatus == 1 was completely unnecessary. This logic was mistakenly copied from an older script and caused the directional restriction bug. Once removed, the player can move freely in both directions without breaking the movement system. After confirming that the fix works correctly and does not affect the player controller, we move on to implementing a bullet shooting system. To keep the project clean and modular, we create two separate scripts: Bullet Movement Script Bullet Spawner Script The Bullet Movement Script is responsible for moving the bullet forward from the gun’s tip. We use Unity’s Update() method to continuously move the bullet in the forward (Z) direction, ensuring it follows the player’s aiming direction. Bullet speed is controlled using a SerializeField variable, allowing us to tweak values directly from the Inspector without modifying code. Instead of using heavy bullet models, we create a simple cube-based bullet. Since bullets travel at very high speeds, complex meshes are unnecessary and waste performance. To improve visibility, we add a basic material with emission, giving the bullet a laser-like appearance. This approach keeps performance high while still looking visually clean. We also handle pivot and axis alignment issues, which are common when working with weapon models. By using empty GameObjects and aligning them correctly with the world axis, we ensure bullets spawn in the correct direction every time. Once the bullet is ready, we convert it into a prefab, making it reusable throughout the project. We also assign a Bullet tag, which will later help with collision detection and damage logic. Next, we create the Bullet Spawner Script. This script listens for player input (such as pressing the F key) and spawns the bullet prefab at the gun’s tip. This keeps firing logic separate from bullet behavior, making the system easier to expand later with features like fire rate control, ammo systems, or object pooling. By the end of this video, you’ll have: A fixed movement trigger system A working bullet prefab A clean bullet movement script A functional bullet spawner Proper prefab and transform setup This tutorial is perfect for beginners and intermediate Unity developers working on: FPS or TPS games Shooting mechanics Player movement bugs Prefabs and transforms Performance-friendly project setups In future videos, we’ll expand this system with collision detection, damage handling, and object pooling for better performance. 🧠 Why This Approach? Instead of using heavy bullet models, we use a simple cube with emission, which is: Performance-friendly Nearly invisible at high speed anyway Ideal for fast-paced shooters We also structure everything into separate scripts (movement & spawner) to keep the project scalable and clean. This tutorial is perfect if you are: Learning Unity FPS mechanics Building a shooting system step by step Fixing trigger-based movement bugs Working with prefabs, transforms, and forward direction Optimizing for performance in real-time games 📌 In the next video, we’ll continue by improving the bullet spawner, handling collisions, and expanding the shooting logic.
- 19Просмотров
- 1 неделя назадОпубликованоTasty Cherry Games
🔥 How to Make a Game Like Lost War ads - Part 28 || Fix Movement Trigger Bug & Bullet Spawner
Похожее видео


Популярное
Новини