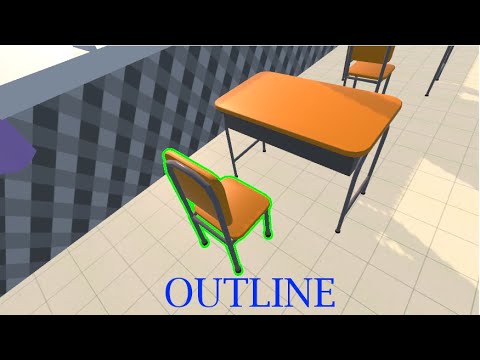
👀 Unity Object Highlight When Looked At – Add AAA Feel in Under 5 Minutes! Sick of boring interactions that feel flatter than week-old soda? In this video, I’ll show you how to highlight objects in Unity using raycasts and an outline shader — just like the pros do. Whether it’s pickups, doors, NPCs, or anything else, this’ll make your game feel ten times more alive. Perfect for indie devs, beginners, and anyone who wants to add that juicy, polished game feel without digging through 40-minute lectures or bloated asset store plugins. 🔥 What You’ll Learn: Raycasting from the camera to detect what's being looked at Applying a clean outline shader only to targeted objects Making the highlight only appear when you’re actually looking at it How to toggle the effect smoothly with zero jank Making it work with any object using simple tags or layers 💡 Bonus: Use this to trigger tooltips, interactions, or player UI later! ⏱ Timestamps: 00:00 – Intro 00:26 – Scene Setup 02:13 – Outline Shader Logic 04:00 - Scripting 06:23 – Outro 📢 Want more game feel upgrades? 👍 Smash that LIKE button if this made your interactables look sexy as hell 🔔 SUBSCRIBE for more short, no-fluff Unity tutorials that actually teach 💬 COMMENT what system you want me to fix next — I read every single one. Yes, even the dumb ones. 🎯 Shader Credit (Legend Tier Tutorial): I learned this outline effect from BinaryLunar’s brilliant shader video. Watch it here: 👉 🔍 Keywords (SEO That Works): Unity Object Outline, Unity Look At Highlight, Unity Interactable Shader, Unity Raycast Highlight, Unity Shader Graph Outline, Unity 3D Interaction UI, Unity Game Feel, Unity Dev Tips, Unity Raycast Tutorial, Unity Visual Feedback, Unity Beginner Tutorial, Unity Interaction System 🎵 Music Credit: Track: NEFFEX – Cold [NCS Release] Music provided by: NoCopyrightSounds Watch:
- 721Просмотров
- 5 месяцев назадОпубликованоRedstoneinvente Game Studio
How to Highlight Objects with Raycasting in Unity – EASY
Похожее видео

Популярное
Новини