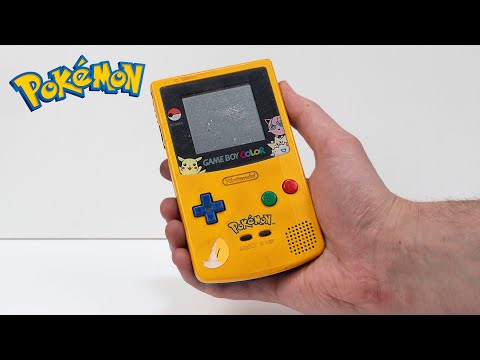
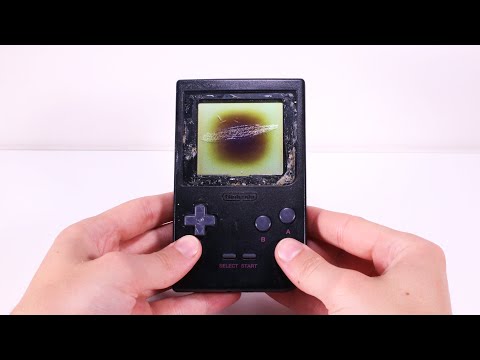
Hello my lovely Subscribers! In this video you will see how i restored this broken game boy. To restore this game boy i use some simple technique: retrobright, soldering, cleaning with isopropilique alcohool. The retrobright took me almost 2 days, for that you need some uv light and 12% hydrogen peroxide. The console was broken because 2 wires was disconected from the motherboards. This video is a colaboration with The Retro Future! You need to check his video because is very good! The game boy cost me 9$ from ebay and was very dirty and yellowed. This restoration took me 2 weeks to complete. Thank you for Watching! 👉The Retro Furniture video - 👈 👇👇👇👇👇👇👇👇👇👇👇👇👇👇👇 My Ebay listing - ☝️☝️☝️☝️☝️☝️☝️☝️☝️☝️☝️☝️☝️☝️☝️ 👇👇👇👇👇👇👇👇👇👇👇👇👇👇👇 More cool videos to watch! GIGANTIC Lighter Restoration - World Largest Lighter - Halberd AXE Restoration - With Epoxy Handle - Iconic Bread Guillotine RAADVAD - Restoration - $5 Broken SPACE INVADER Console Restoration and Testing - - I Turned this Knife in to a Piece of Art (24K GOLD) - With EPOXY Restoration - - $5 Broken SPACE INVADER Console Restoration and Testing - - Broken Level Restoration - With Epoxy Resin - - $1 Vintage Car Horn - NOT WORTH RESTORING - ASMR Restoration - - Antique Rusty Saw Epoxy Handle Restoration - If you want to help me create more cool videos you can support me on Patreon or Paypall Instagram PayPall Patreon Facebook
- 5256903Просмотров
- 5 лет назадОпубликованоTysyTube Restoration
I Restored This $9 Broken Gameboy and SHIP it to another Youtuber
Похожее видео


Популярное
Новини