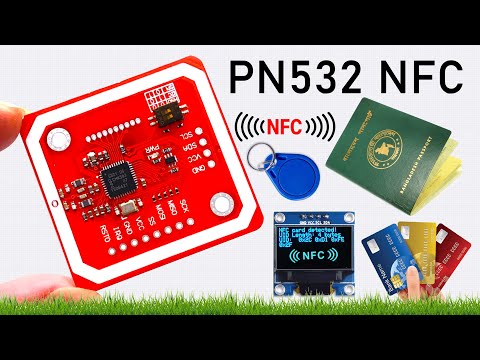
In this video, you’ll learn how to interface the PN532 NFC RFID module with an Arduino in this step-by-step beginner’s guide. We will walk you through the complete setup process, from wiring the hardware to writing the code, and provide tips for troubleshooting common issues. By the end of this tutorial, you’ll be able to read and write data to NFC tags using the PN532 module and Arduino. This guide is perfect for anyone new to NFC or RFID technology and looking to get started with Arduino. What you’ll learn: How to connect the PN532 module to your Arduino (I2C, SPI, or UART modes). Basic NFC tag reading and writing with Arduino. Understanding PN532 communication protocols and libraries. Displaying NFC data on an OLED screen (optional). Required Components: PN532 NFC RFID module Arduino UNO or Nano Breadboard and jumper wires NFC tags/cards OLED display (optional) Libraries: Adafruit PN532, Adafruit GFX, Adafruit SSD1306 Don't forget to like, comment, and subscribe for more tutorials! Let us know in the comments if you have any questions or need further assistance. Links: Download PN532 Library: OLED Display Library: 3 Library - Adafruit SSD1306+ Adafruit GFX + Adafruit-PN532 Download code: Learn More: CD: LIKE | COMMENT | SHARE | SUBSCRIBE === = = = = = = = == = = = == = = = == = = == = = = = == = = = = = = = == = = = = = == ★★ Please like and subscribe ★★ === = = = = = = = == = = = == = = = == = = How to extend wifi range with another router wirelessly How To Program ATtiny85 Microcontroller with Arduino Uno || Programming And Burn Bootloader TP-Link To Netgear Router Wireless Internet Sharing || Router As WiFi Repeater, Range Extender - WDS view ip camera easy way How to extend wifi range with another router sokoban level 11 solution ★★=== = = = = = = = ==★★ Contact us for any enquiries : EmailForViewers@ ★★=== = = = = = = = ==★★ #yellowpurple #Arduino #NFC === = = = = = = = == = = = == = = = == = =
- 8762Просмотров
- 1 год назадОпубликованоYellow Purple
How to Interface PN532 NFC RFID with Arduino: Beginners Guide
Похожее видео


Популярное
Новини