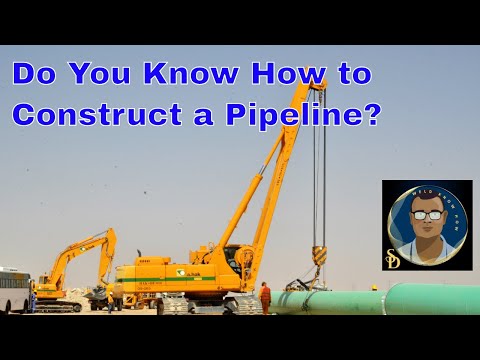
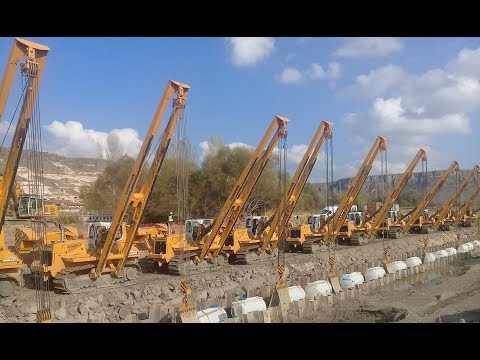
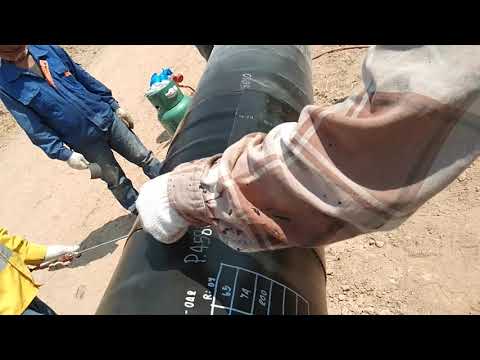
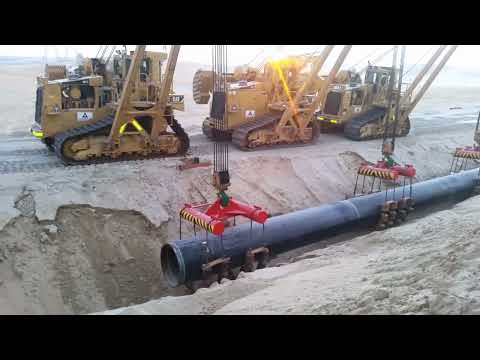
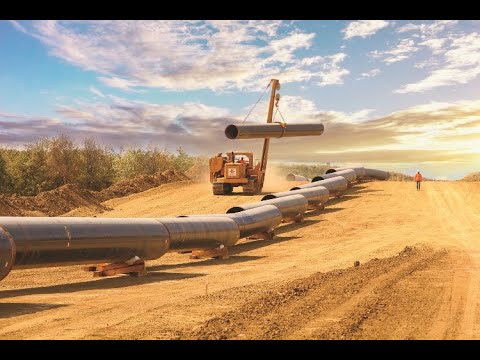
Pipeline Lowering || How To Lower A Pipeline Strings Into The Trench After Welding? Lowering a pipeline string into a trench after welding is a critical step in pipeline installation. It requires careful planning, the right equipment, and adherence to safety standards to prevent damage to the pipe, coatings, or welds. Here's a step-by-step guide: ### 1. **Prepare the Trench** - Ensure the trench is excavated to the proper depth and width. - Remove debris, rocks, or sharp objects that could damage the pipeline. - Verify the trench's bottom is level or padded with a soft material like sand or specialized padding if necessary. ### 2. **Inspect the Pipeline** - Perform a thorough inspection of the pipeline to check for defects, weld quality, and coating integrity. - Apply any necessary protective coatings or wraps to the weld areas to prevent corrosion. ### 3. **Use the Right Equipment** - Employ sidebooms, cranes, or specialized lowering-in machines equipped with padded slings or rollers to handle the pipeline without damaging it. - Ensure equipment is rated for the pipeline's weight and size. ### 4. **Attach the Pipeline to the Lowering Equipment** - Use padded slings, spreader bars, or rollers to distribute the load evenly along the pipeline. - Position slings at appropriate intervals to prevent sagging and ensure the pipe remains supported and level. ### 5. **Coordinate the Lowering Process** - Use a well-coordinated team to manage the lowering operation. Communication between operators, riggers, and ground personnel is crucial. - Assign a supervisor to oversee the process and ensure compliance with safety protocols. ### 6. **Lower the Pipeline Gradually** - Begin lowering the pipeline slowly and evenly to prevent sudden movements that could damage the pipe or coating. - Ensure the pipeline does not scrape against the trench walls or bottom during the process. ### 7. **Monitor Alignment** - Continuously check the alignment of the pipeline with the trench to ensure proper placement. - Adjust as necessary to avoid bends or stress on the pipe. ### 8. **Place the Pipeline in the Trench** - Carefully lay the pipeline into its final position at the bottom of the trench. - Verify the pipeline is seated properly and matches the required grade and alignment. ### 9. **Inspect After Placement** - Perform a final inspection to ensure the pipeline is undamaged and correctly positioned. - Check for any visible signs of coating damage or misalignment. ### 10. **Backfill the Trench** - Begin backfilling the trench once the pipeline is properly positioned and inspected. - Use suitable materials and techniques to avoid damage to the pipeline during backfilling. ### Safety Considerations: - Ensure all personnel involved are trained and aware of safety protocols. - Maintain a safe distance from moving equipment. - Use proper personal protective equipment (PPE) such as helmets, gloves, and high-visibility vests. This method ensures a safe and efficient process while protecting the integrity of the pipeline.
- 15058Просмотров
- 2 года назадОпубликованоOil & Gas field Quality control
Pipeline Lowering || How To Lower A Pipeline Strings Into The Trench After Welding?
Похожее видео


Популярное
Новини