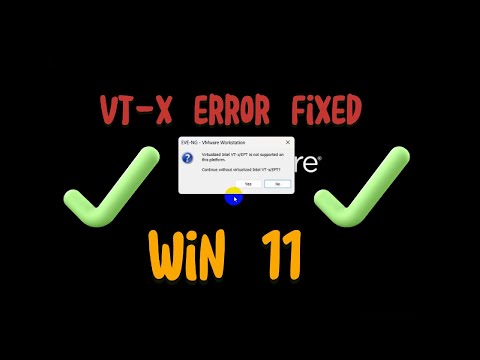
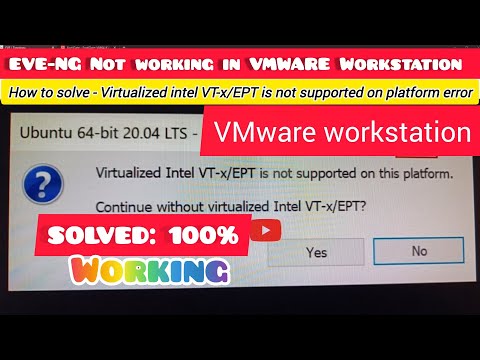
Are you frustrated with the "Intel VT-x/EPT Not Supported" error message? Don’t worry! In this tutorial, I’ll show you the step-by-step method to resolve this issue and enable virtualization on your PC. Perfect for Windows 10 & 11 users, this fix is quick and efficient! **In This Video:** 1️⃣ Disable Hyper-V using Command Prompt 2️⃣ Turn off Hyper-V using PowerShell 3️⃣ Restart and verify the solution 👍 **Like, Subscribe, and hit the bell for more tech fixes!** #IntelVTx #VirtualizationFix #techsupport #windows11 1. Open Command Prompt as Administrator: Press Win + X and select Command Prompt (Admin) or Windows Terminal (Admin). "bcdedit /set hypervisorlaunchtype off" 2. Open PowerShell as Administrator: Press Win + X and select Windows PowerShell (Admin) or Terminal (Admin). Run the Following Command to Disable Hyper-V: "Disable-WindowsOptionalFeature -Online -FeatureName Microsoft-Hyper-V-All" After the command completes, you’ll be prompted to restart your computer for the changes to take effect. Type Y and press Enter to restart immediately or restart manually later. If you liked the video and want to help me continue creating content kindly support me: #IntelVTx #VirtualizationFix #techtips #windows11 #hypervisor #PCTroubleshooting #computerhelp #itsupport #FixIntelErrors #techhacks
- 10770Просмотров
- 1 год назадОпубликованоZabExplains
Fix Intel VT-x/EPT Not Supported on Your Computer | Quick and Easy Solution! 🔧
Похожее видео


Популярное
Новини