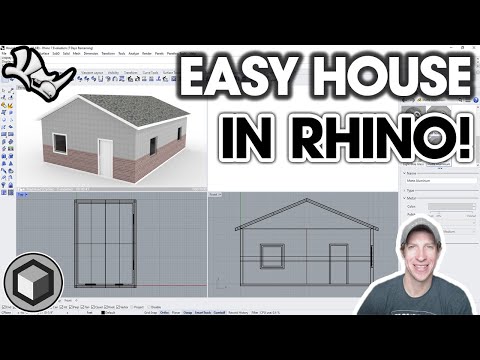
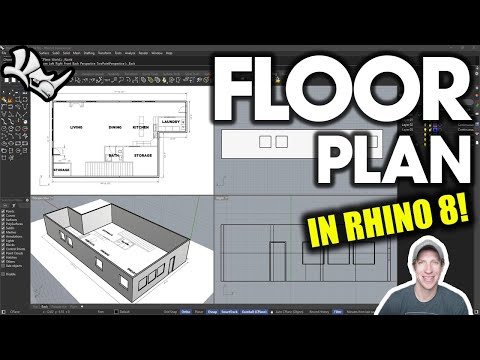
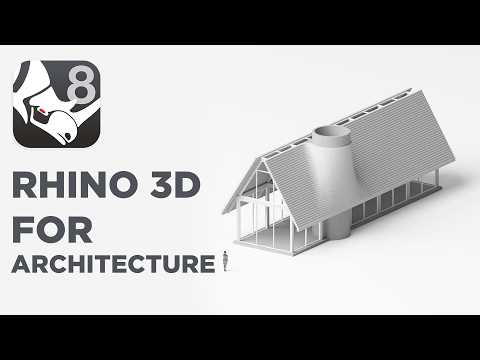
In this video, we're going to talk about how we can model a floor plan in 3D in Rhino. We'll talk about laying out our floor plan, extruding to 3D, adding doors and windows, and adding materials. If you're getting started with Rhino for Architectural modeling, this video is a good place to start! DOWNLOAD EXAMPLE FLOOR PLAN HOW TO USE SNAPPING IN RHINO HOW TO USE THE GUMBALL IN RHINO Disclaimers: All opinions are my own, sponsors are acknowledged. Product Links in the description are typically affiliate links that let you help support the channel at no extra cost. The Rhinoceros name, logo, brand, and other trademarks or images featured or referred to on my YouTube channel are the sole property of Robert McNeel & Associates. Neither I nor this YouTube channel is affiliated with, endorsed by, or sponsored by Robert McNeel & Associates any of their affiliates. TIMESTAMPS 0:00 - Introduction 0:11 - Starting a New Project 0:45 - Modeling Floor Plan Perimeter 3:00 - Adding wall thickness with offsets 4:45 - Extruding our walls to 3D 6:04 - Adding a Slab to the Floor 7:13 - Adding Door Openings 9:06 - Adding Window Openings 11:14 - Modeling Doors for our Floor plan 13:06 - Modeling our Door Frame 15:03 - Modeling a Window and Frame 16:50 - Re-Using Doors and Windows to Save Time 18:25 - Adding Materials to our objects 19:50 - Adding materials based on layer - Time Saver! 22:28 - How to view the glass materials in Ray Traced Mode
- 153674Просмотров
- 3 года назадОпубликованоThe Rhino Essentials
How to Create a 3D Floor Plan in Rhino - BEGINNERS START HERE!
Похожее видео


Популярное
Новини